Navigating the world of baby essentials can feel overwhelming, especially when it comes to ensuring your little one’s health and safety. Among the myriad of choices, sterilizing baby bottles is paramount, a critical step often simplified by modern appliances. But with so many options available, how do you choose the right one? This comprehensive review delves into the Philips Avent Advanced Bottle Sterilizer, a popular choice among parents, to help you understand its features, benefits, and potential drawbacks, ensuring you make an informed decision for your family.
Why Sterilize Baby Bottles?
The delicate immune systems of newborns and infants require meticulous care, and proper hygiene of feeding equipment is non-negotiable. Sterilizing baby bottles eliminates harmful bacteria and germs that can lead to illnesses, infections, and digestive issues. While traditional methods like boiling offered a solution, they were often time-consuming, prone to error, and lacked sustained sterility. Modern bottle sterilizers have emerged as an efficient and convenient alternative, providing peace of mind to busy parents.
Common Types of Bottle Sterilizers
The market offers several types of bottle sterilizers, each with distinct advantages and considerations:
- Steam Sterilizers: These are the most common and often lauded for their effectiveness. They use the power of pure steam to kill 99.9% of germs.
- Pros: Chemical-free, generally affordable, easy to use, and quick.
- Cons: Can leave items wet, some models may accumulate limescale, and require regular descaling.
- Microwave Sterilizers: Compact and fast, these sterilizers leverage microwave energy to create steam.
- Pros: Extremely quick cycles, ideal for small spaces or travel.
- Cons: Requires a microwave, not all bottle types are compatible, and capacity can be limited.
- UV Sterilizers: Utilizing ultraviolet light, these devices sterilize without heat or water.
- Pros: No water needed, no drying required, energy-efficient, often doubles as storage.
- Cons: Higher initial cost, UV bulbs need periodic replacement, and effectiveness depends on direct UV exposure to all surfaces.
- Sterilizer-Dryers (All-in-One): These units combine steam sterilization with a drying cycle.
- Pros: Ultimate convenience, bottles are ready to use or store immediately, saving time and effort.
- Cons: Typically more expensive and may have a larger footprint.
Comparing Bottle Sterilizer Types
Understanding the differences at a glance can aid your decision-making process:
| Feature | Steam Sterilizer | Microwave Sterilizer | UV Sterilizer | Sterilizer-Dryer |
|---|---|---|---|---|
| Price Range | Low to Medium | Low | High | Medium to High |
| Cycle Time | Medium (10-15 mins) | Fast (2-6 mins) | Fast (10-20 mins) | Long (40-60 mins) |
| Germ Kill | High (99.9%) | High (99.9%) | Very High (99.9%) | Very High (99.9%) |
| Convenience | Good | High | Very High | Excellent |
| Drying Function | No (typically) | No | Yes | Yes |
| Water Needed | Yes | Yes | No | Yes |
Key Criteria for Choosing a Bottle Sterilizer (Buying Guide)
Selecting the perfect bottle sterilizer involves weighing several factors to match your family’s needs and lifestyle:
- Capacity: Consider how many bottles and accessories you sterilize daily. A larger family or a baby who feeds frequently might benefit from a higher-capacity unit. Some sterilizers can hold up to six bottles along with smaller items like pacifiers and pump parts.
- Size: Kitchen counter space is often precious. Measure your available space to ensure the sterilizer fits comfortably without being an obstruction. Modular designs offer flexibility, allowing you to adjust the unit’s size for smaller loads.
- Material Safety: Always prioritize sterilizers made from BPA-free materials to ensure no harmful chemicals leach into your baby’s feeding equipment.
- Features: Beyond basic sterilization, look for features that enhance convenience. These might include automatic shut-off, a “stay-sterile” function (keeping items sterile for up to 24 hours with the lid closed), or a dedicated drying cycle. The inclusion of a drip tray to prevent unpleasant odors is also a valuable addition.
- Brand Reputation & Warranty: Opt for reputable brands known for quality and customer support. A good warranty provides assurance against manufacturing defects.
- Price: Sterilizers come in a wide range of prices. Determine your budget and balance it against the features and convenience you desire. Remember that investing in a reliable sterilizer can save you time and provide peace of mind in the long run.
Review: The Philips Avent Advanced Bottle Sterilizer (SCF291/00)
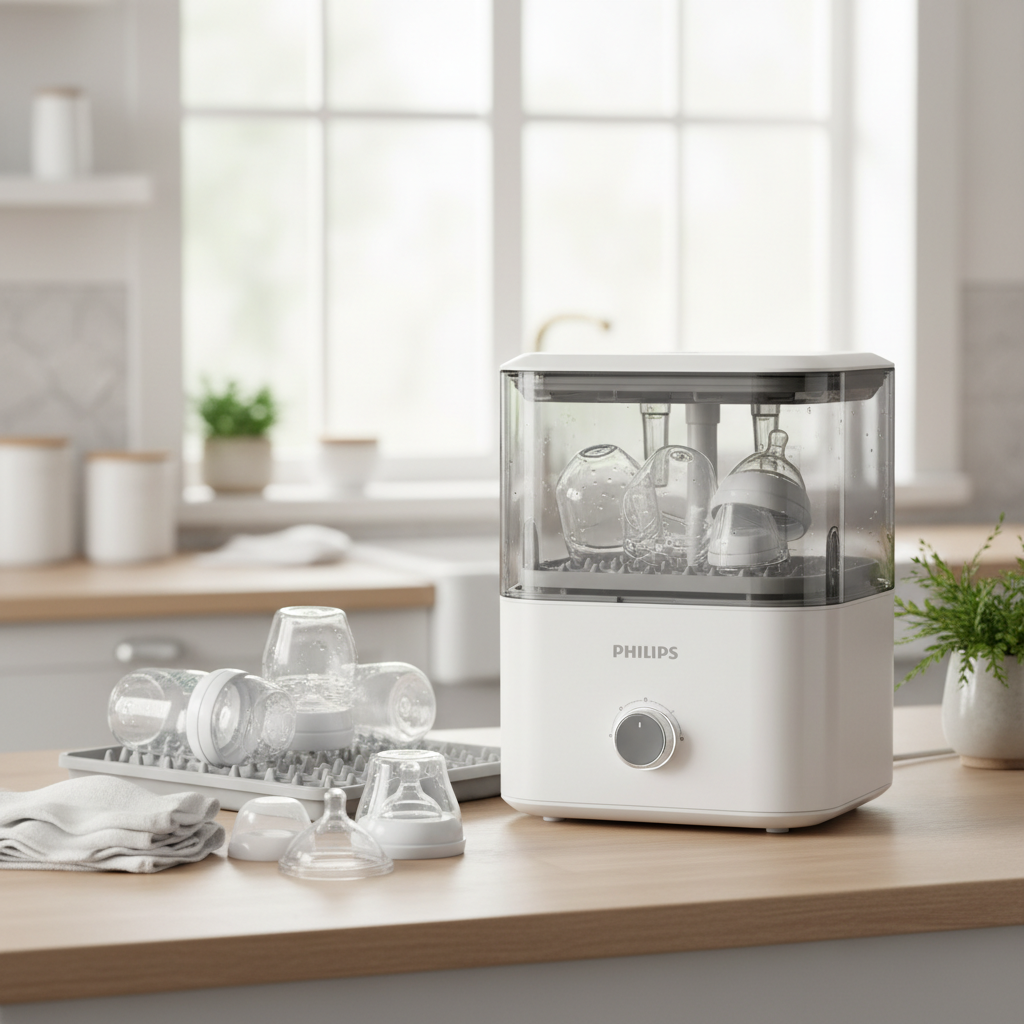
The Philips Avent Advanced Bottle Sterilizer (model SCF291/00) stands out as a popular steam-based solution for parents focused on hygiene and simplicity. It’s designed to deliver effective, chemical-free sterilization with everyday ease.
This sterilizer utilizes the proven power of pure steam to eliminate 99.9% of harmful germs within a quick 10-minute cycle. This rapid and thorough process provides vital peace of mind, knowing your baby’s bottles, pacifiers, and pump parts are hygienically safe. Many parents appreciate its straightforward operation; simply add the recommended 130ml of water, load the items, and press a button. The sterilizer automatically switches off once the cycle is complete, making it a “set it and forget it” device.
One of its most highlighted features is the modular design. It boasts a compact exterior that fits well on most kitchen countertops, yet offers a surprisingly roomy interior capable of holding up to six Philips Avent bottles, along with nipples, screw rings, and other small accessories. Users also find it adaptable, allowing for smaller configurations when sterilizing fewer items like soothers or breast pump components. The updated drip tray is a thoughtful addition, designed to protect the heating plate from milk droplets and reduce the chance of unpleasant odors building up over time. Moreover, if the lid remains unopened, the contents inside stay sterile for up to 24 hours, offering excellent flexibility for busy schedules.
However, it’s important to note a common point of feedback regarding the SCF291/00 model: it does not include a drying function. Many users report that items remain wet after the sterilization cycle, necessitating air-drying or manual wiping before storage. This can be a significant drawback for parents seeking an all-in-one solution. Some taller bottles from other brands (e.g., Dr. Brown’s 8oz) might also be a tight fit, although most standard bottles and Avent’s own fit well. Additionally, while designed for space-saving, it still occupies a dedicated spot on the counter, and users should be mindful of potential water spillage when emptying the base after a cycle.
“For parents seeking reliable, fast, and chemical-free sterilization, the Philips Avent Advanced Bottle Sterilizer offers exceptional value and performance. Its efficiency in germ elimination is a cornerstone of infant care.”
For those who prioritize an integrated drying solution, Philips Avent also offers the “Advanced Bottle Sterilizer and Dryer Premium” (SCF293), which includes a hot, filtered air drying cycle, adding another layer of convenience. However, this comes with a higher price point and a longer overall cycle time when drying is included.
How to Use and Maintain Your Philips Avent Advanced Bottle Sterilizer
Proper usage and regular maintenance are crucial for maximizing the effectiveness and lifespan of your sterilizer:
Usage Instructions:
|
Our Picks for the Best Bottle sterilizer in 2026
As an Amazon Associate I earn from qualifying purchases.
|
||
| Num | Product | Action |
|---|---|---|
| 1 | Bottle Sterilizer, Baby Bottle Steam Sterilizer, Electric Baby Bottle Sanitizer with Timer for Baby Bottles, Pacifiers, Pump Parts |

|
| 2 | Momcozy KleanPal Pro Baby Bottle Washer, Sterilizer & Dryer - All-in-One Cleaning Machine for Bottles, Pump Parts & Baby Essentials - Time-Saving & Effortless Care |
|
| 3 | Bottle Sterilizer and Dryer, 99.999% Deep Sterilization, 6-min Rapid Disinfection, Up to 12 Bottles, HEPA Filter, All-in-One for Baby Bottles, Breast Pump Parts & Newborn Essentials |
|
| 4 | Dr. Brown's All-in-One Sterilizer and Dryer for Baby Bottles, Parts and Other Newborn Essentials |
|
| 5 | HEYVALUE Ease-Steam Bottle Sterilizer, Compact Baby Bottle Sterilizer, Fast One-Touch Operation (Esterilizador de Biberones), Electric Sterilizer for Baby Bottles, Baby Essentials & Breast Pump Parts |
|
| 6 | Bear Bottle Sterilizer and Dryer, 2 Layers Large Electric Steam Baby Bottle Sterilizer, Fast Bottle Sanitizer and Dryer for All Bottles & Accessories, Time-Saving Design |
|
| 7 | GROWNSY Bottle Sterilizer and Dryer, Compact Electric Steam Baby Bottle Sterilizer (Esterilizador de Biberones), Bottle Sanitizer for Baby Bottles, Pacifiers, Pump Parts |
|
| 8 | Papablic Baby Bottle Sterilizer and Dryer Pro, Esterilizador De Biberones, Electric Steam Sterilizer for Baby Bottles, Pacifiers, and Pump Parts, Large Capacity 10 Bottles |
|
| 9 | Momcozy 3 Layers Large Bottle Sterilizer and Dryer, Fast Sterilize and Dry, Universal Bottle Sterilizer for All Bottles & Breast Pump Accessories, Touch Screen & Auto-Off Bottle Sanitizer |
|
| 10 | Momcozy Bottle Sterilizer and Dryer, Modular Nesting Space Saving Design, 6 Bottles Capacity, 4 in 1 Compact Sterilizer for Baby Bottles, Breast Pump Parts & Newborn Essentials, Drying Rack Included |
|
- Pre-Clean Items: Always wash bottles, nipples, and other accessories thoroughly with soap and water before placing them in the sterilizer. Disassemble all parts completely.
- Add Water: Pour exactly 130ml of water into the water reservoir at the base of the sterilizer. While tap water can be used, distilled or purified water is highly recommended to minimize limescale buildup, especially in hard water areas.
- Load Items: Place bottles upside down in the large basket. Position nipples, screw rings, and other small accessories in the smaller basket or upper tray, ensuring their openings face downwards to prevent water collection.
- Start Cycle: Secure the lid, plug in the sterilizer, and press the power button. The indicator light will illuminate, signifying the start of the 10-minute sterilization cycle. The unit will automatically turn off once complete.
- Cool Down and Remove: Allow the sterilizer to cool down for at least 5 minutes before opening the lid. Lift the lid away from you to avoid hot steam. Use tongs to remove smaller, hot items. Remember, items will be wet and will require air-drying if your model does not have a drying function.
- Maintain Sterility: Keep the lid closed if you’re not immediately using the items; they will remain sterile for up to 24 hours.
Maintenance Tips:
- Empty After Each Use: Pour out any remaining water from the base and wipe it clean with a damp cloth to prevent residue buildup and odors.
- Descaling: Limescale can accumulate over time, affecting performance. Descale your sterilizer regularly, ideally every 2 to 4 weeks, or more frequently in hard water areas.
- Method: Unplug the sterilizer. Mix approximately 80ml of white vinegar (5% acetic acid) with 20ml of cold water (or 12ml vinegar with 120ml water, depending on instructions for your specific sub-model). Pour this solution into the heating plate area. Let it sit until the scale dissolves, usually for several hours or overnight. For stubborn stains, a gentle brush can help.
- Rinse Thoroughly: After descaling, empty the solution, and rinse the base several times with fresh water, wiping it clean. Run a sterilization cycle with just water to remove any residual vinegar smell.
- Clean Filter: If your model has a filter, check and clean it every 4 weeks.
Important Considerations When Using Your Bottle Sterilizer
Safety and optimal performance go hand-in-hand when using any baby appliance:
- Read the Manual: Always read the user manual thoroughly before the first use and refer to it for specific instructions unique to your model.
- Clean First: Sterilization is not cleaning. Always ensure all bottles and accessories are washed clean of milk residue before sterilizing.
- Avoid Overfilling: Do not exceed the recommended water level (130ml) to prevent splashes and ensure efficient steam production.
- Caution with Heat: The base, baskets, and lid become very hot during and shortly after operation. Always lift the lid away from your face to avoid hot steam, and use the provided tongs for small items.
- No Liquids in Items: Do not sterilize items filled with liquid (e.g., teethers with cooling fluid).
- Placement: Place the sterilizer on a dry, stable, level surface, away from edges. Never move or open the appliance while it’s in use or still hot.
Conclusion
The Philips Avent Advanced Bottle Sterilizer (SCF291/00) is a reliable and efficient tool for maintaining a hygienic feeding routine for your baby. Its quick steam cycles, modular design, and robust germ-killing capabilities make it a strong contender for parents seeking a chemical-free sterilization method. While the absence of an integrated drying function is a key consideration, its overall performance, ease of use, and reputation for safety position it as a highly recommended choice in the steam sterilizer category. If an all-in-one sterilizer and dryer is a non-negotiable for your lifestyle, you might consider the Philips Avent Advanced Bottle Sterilizer and Dryer Premium. Ultimately, investing in a good sterilizer like the Philips Avent Advanced model contributes significantly to your baby’s health and your peace of mind.
What features do you value most in a bottle sterilizer, and how does the Philips Avent Advanced model align with your parenting needs?
Frequently Asked Questions
Does the Philips Avent Advanced Bottle Sterilizer dry bottles?
The standard Philips Avent Advanced Bottle Sterilizer (SCF291/00) uses steam and does not include a drying function, meaning items will remain wet after the cycle and require air-drying. Philips also offers an “Advanced Bottle Sterilizer and Dryer Premium” (SCF293) which does feature a drying cycle.
How much water do I put in the Philips Avent Advanced Bottle Sterilizer?
You should add exactly 130ml of water to the water reservoir at the base of the sterilizer for each cycle. Using distilled or purified water is recommended to prevent mineral buildup and extend the appliance’s lifespan, especially in hard water areas.
How often should I descale my Philips Avent Advanced Sterilizer?
It is recommended to descale your Philips Avent Advanced Sterilizer every 2 to 4 weeks, depending on the hardness of your water. Regular descaling helps maintain optimal performance and prevents the accumulation of limescale, which can affect efficiency.
Can I sterilize non-Philips Avent bottles in this sterilizer?
Yes, the Philips Avent Advanced Bottle Sterilizer is generally compatible with most bottle brands and other baby items like pump parts, pacifiers, and small toys, as long as they fit inside the modular baskets. However, some taller 8oz bottles from certain brands might not fit comfortably.
How long do bottles stay sterile in the Philips Avent Advanced Sterilizer?
After the 10-minute sterilization cycle is complete, items inside the Philips Avent Advanced Bottle Sterilizer will remain sterile for up to 24 hours, provided that the lid is kept closed and unopened. This allows for convenience and flexibility in preparing your baby’s feeds.