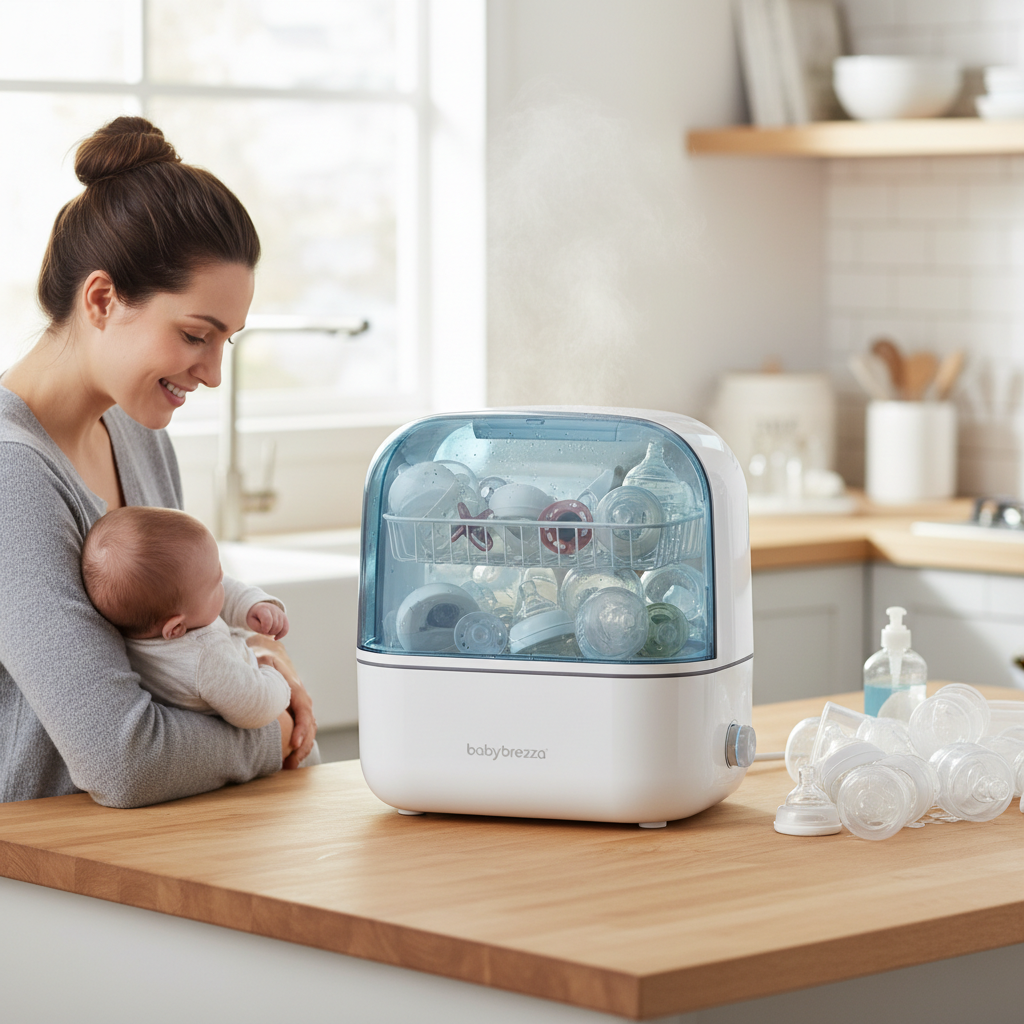
Becoming a parent ushers in a world of joy, but also a new set of responsibilities, not least of which is ensuring your baby’s feeding equipment is impeccably clean and safe. From tiny bottles to pump parts and pacifiers, microscopic threats can linger even after a thorough wash. This is where a reliable bottle sterilizer becomes an invaluable asset in any parent’s arsenal, offering peace of mind and protecting your little one’s delicate health.
Why Sterilization is Essential for Your Baby’s Health
The journey of parenthood is filled with countless decisions, and ensuring the health and safety of your baby is paramount. While simply washing baby bottles and accessories removes visible milk residue, it often isn’t enough to eliminate harmful bacteria and germs that can thrive in feeding environments. For infants, especially those under two months old or with weakened immune systems, exposure to these microbes can lead to serious infections and illness. Sterilizing goes beyond cleaning; it uses intense heat or UV light to destroy 99.9% of bacteria, viruses, and fungi, providing a truly hygienic surface for your baby’s feeding needs. This crucial step safeguards their developing immune system and contributes to their overall well-being.
Traditional sterilization methods, such as boiling on a stovetop, can be time-consuming and often come with safety concerns like potential burns or the need to constantly monitor items to ensure they remain submerged. Modern bottle sterilizers offer a safer, more efficient, and convenient alternative, streamlining your routine and providing consistent, reliable results.
Understanding the Types of Bottle Sterilizers
The market offers a variety of bottle sterilizers, each employing different technologies to achieve germ-free feeding accessories. Understanding their mechanisms, advantages, and limitations can help you choose the best fit for your family’s lifestyle and needs.
Steam Sterilizers
Steam sterilizers, often electric countertop units, work by heating water to generate high-temperature steam. This steam envelops bottles and accessories, effectively killing bacteria and germs.
- Principle: Water is heated to boiling, producing steam that reaches temperatures hot enough to sanitize.
- Pros: Generally affordable, easy to use, chemical-free, and effective at killing a wide range of microorganisms. Many models have a larger capacity and can keep items sterile for several hours if the lid remains closed.
- Cons: Can be bulky on the countertop, sterilization cycles can take longer (typically 8-15 minutes, plus cooling time), and require descaling to prevent mineral buildup from hard water.
|
Our Picks for the Best Bottle sterilizer in 2026
As an Amazon Associate I earn from qualifying purchases.
|
||
| Num | Product | Action |
|---|---|---|
| 1 | Momcozy KleanPal Pro Baby Bottle Washer, Sterilizer & Dryer - All-in-One Cleaning Machine for Bottles, Pump Parts & Baby Essentials - Time-Saving & Effortless Care |

|
| 2 | Momcozy 3 Layers Large Bottle Sterilizer and Dryer, Fast Sterilize and Dry, Universal Bottle Sterilizer for All Bottles & Breast Pump Accessories, Touch Screen & Auto-Off Bottle Sanitizer |
|
| 3 | Bear Bottle Sterilizer and Dryer, 2 Layers Large Electric Steam Baby Bottle Sterilizer, Fast Bottle Sanitizer and Dryer for All Bottles & Accessories, Time-Saving Design |
|
| 4 | GROWNSY Bottle Sterilizer and Dryer, Compact Electric Steam Baby Bottle Sterilizer (Esterilizador de Biberones), Bottle Sanitizer for Baby Bottles, Pacifiers, Pump Parts |
|
| 5 | Bottle Sterilizer, Baby Bottle Steam Sterilizer, Electric Baby Bottle Sanitizer with Timer for Baby Bottles, Pacifiers, Pump Parts |
|
| 6 | Dr. Brown's All-in-One Sterilizer and Dryer for Baby Bottles, Parts and Other Newborn Essentials |
|
| 7 | HEYVALUE Ease-Steam Bottle Sterilizer, Compact Baby Bottle Sterilizer, Fast One-Touch Operation (Esterilizador de Biberones), Electric Sterilizer for Baby Bottles, Baby Essentials & Breast Pump Parts |
|
| 8 | Papablic Baby Bottle Sterilizer and Dryer Pro, Esterilizador De Biberones, Electric Steam Sterilizer for Baby Bottles, Pacifiers, and Pump Parts, Large Capacity 10 Bottles |
|
| 9 | Momcozy Bottle Sterilizer and Dryer, Modular Nesting Space Saving Design, 6 Bottles Capacity, 4 in 1 Compact Sterilizer for Baby Bottles, Breast Pump Parts & Newborn Essentials, Drying Rack Included |
|
| 10 | Bottle Sterilizer and Dryer, 99.999% Deep Sterilization, 6-min Rapid Disinfection, Up to 12 Bottles, HEPA Filter, All-in-One for Baby Bottles, Breast Pump Parts & Newborn Essentials |
|
Microwave Steam Sterilizers
Utilizing the power of your microwave, these compact units create a steam-filled environment to sterilize baby items rapidly. They are a popular choice for their speed and portability.
- Principle: A small amount of water is added to the base, which then boils in the microwave to create sterilizing steam.
- Pros: Extremely fast (often 2-10 minutes depending on microwave wattage), highly convenient, chemical-free, and compact for easy storage or travel. Items remain sterile for up to 24 hours if the lid is kept closed.
- Cons: Capacity is usually smaller than electric steam sterilizers, relies on the microwave’s wattage for cycle time, and generally does not include a drying function, potentially leaving items wet. Careful handling is required due to hot steam upon opening.
UV Sterilizers
UV sterilizers employ ultraviolet light to eliminate germs without the need for water or heat. This method is increasingly popular for its unique benefits.
- Principle: UV-C light disrupts the DNA of bacteria and viruses, rendering them inactive.
- Pros: Water-free, heat-free (eliminating burn risks), often includes a drying function, and effective for various materials, including electronics not suitable for steam.
- Cons: Typically more expensive, sterilization cycles can take longer (around 10-15 minutes for UV, plus drying), and UV bulbs need periodic replacement. Not all plastics are designed for repeated UV exposure, which can degrade them over time.
Multifunctional Sterilizers (Sterilizer & Dryer)
These advanced units combine sterilization (usually steam or UV) with a drying function, offering an all-in-one solution for busy parents.
- Principle: Combines a sterilization method with a hot air drying cycle.
- Pros: Ultimate convenience, saves time by eliminating the need to air dry, and ensures items are ready for immediate use or storage.
- Cons: Highest price point, larger footprint, and consume more energy due to combined functions.
Comparing Bottle Sterilizer Types
To help you make an informed decision, here’s a comparative overview of the popular bottle sterilizer types:
| Feature | Steam Sterilizer | Microwave Sterilizer | UV Sterilizer | Multifunctional Sterilizer |
|---|---|---|---|---|
| Price | Low to Medium | Low | High | High |
| Sterilization Time | Medium (8-15 min) | Fast (2-10 min) | Medium (10-15 min) | Medium (Sterilize + Dry) |
| Effectiveness | High | High | Very High | Very High |
| Convenience | Medium | High | High | Very High |
| Drying Function | No (sometimes external) | No | Yes | Yes |
| Portability | Low | High | Medium | Low |
| Footprint | Large | Small | Medium to Large | Large |
| Maintenance | Descaling needed | Water measurement | Bulb replacement | Descaling (if steam) |
Key Considerations When Choosing a Bottle Sterilizer (Buying Guide)
Selecting the right bottle sterilizer involves weighing several factors to ensure it meets your specific needs.
- Capacity: Consider how many bottles and accessories you sterilize daily. If you have twins or use a breast pump frequently, a larger capacity unit will save you multiple cycles. Microwave sterilizers typically hold 2-6 bottles, while electric steam units can hold 4-8 or more.
- Size: Measure your countertop space or microwave interior. Compact microwave sterilizers are ideal for smaller kitchens or travel, while larger electric units require dedicated space.
- Material: Prioritize sterilizers made from safe, BPA-free plastics. Reputable brands ensure their products meet safety standards for baby items.
- Features: Beyond basic sterilization, look for features like automatic shut-off, heat-resistant handles, adjustable pegs or trays, and the ability to keep contents sterile for an extended period with the lid closed. A drying function, while increasing cost, can be a major convenience.
- Brand Reputation & Warranty: Opt for established brands known for quality and safety. Check for product warranties and accessible customer service.
- Price: Determine your budget. While UV and multifunctional units are pricier, microwave and basic steam sterilizers offer effective solutions at a lower cost.
Top Bottle Sterilizers: A Closer Look at the Nanobebe Microwave Steam Sterilizer
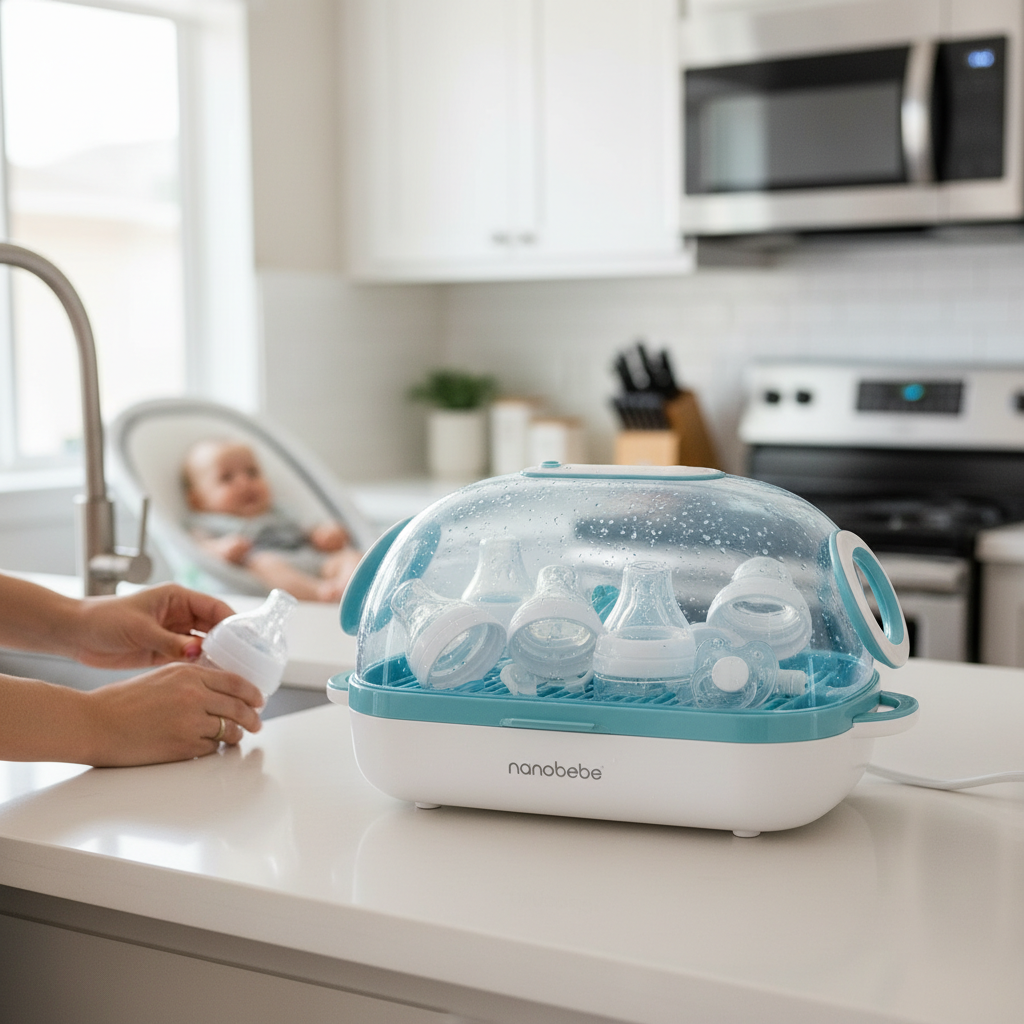
Among the array of options, the Nanobebe Microwave Steam Sterilizer stands out as an excellent choice for parents seeking speed, efficiency, and convenience. This compact powerhouse is designed to make bottle sterilization quick and hassle-free, integrating seamlessly into busy routines.
The Nanobebe Microwave Steam Sterilizer excels in its core function: rapid, chemical-free sterilization. It leverages the power of steam within your microwave to eliminate 99.9% of household germs and bacteria in as little as 4 minutes, depending on your microwave’s wattage. This speed is a game-changer for parents who need clean bottles ready in a flash, whether for a hungry baby or preparing for the next feeding. The unit is designed to hold various items, including Nanobebe’s own innovative bottles, other bottle brands, breast pump components, and pacifiers, offering versatile utility. Its adjustable pegs allow for flexible configuration, accommodating different shapes and sizes of baby feeding essentials.
Ease of use is a hallmark of the Nanobebe sterilizer. Simply add the recommended amount of water (typically around 6.5 ounces or 200ml) to the base, load your pre-washed items, secure the lid, and place it in the microwave. After the short cycle, heat-resistant handles and secure latches ensure safe handling when removing the hot unit. Once sterilized, if the lid remains closed, the contents stay sterile for up to 24 hours, offering incredible flexibility for preparing bottles in advance. While it does not include a drying function, items can be left inside to air dry, or carefully removed with tongs and placed on a drying rack. Its durable, BPA-free construction ensures both longevity and safety for your baby. Its lightweight and compact design also makes it an ideal companion for travel or for those with limited kitchen space.
How to Use and Maintain Your Bottle Sterilizer
Proper usage and regular maintenance are crucial for maximizing the effectiveness and lifespan of your bottle sterilizer.
Using the Nanobebe Microwave Steam Sterilizer:
- Clean First: Always wash bottles, nipples, pump parts, and other accessories thoroughly with warm, soapy water and rinse completely before placing them in the sterilizer. Milk residue can affect sterilization effectiveness.
- Add Water: Pour 6.5 ounces (approximately 200ml) of clean water into the base of the sterilizer, beneath the perforated tray. Do not overfill or underfill, as this can impact the steam generation.
- Load Items: Place bottles upside down on the pegs, ensuring nipples, collars, and other small parts are arranged so steam can circulate freely. Use the adjustable pegs to fit various sizes.
- Microwave: Secure the lid tightly. Place the sterilizer in your microwave, ensuring it doesn’t touch the sides or top. Refer to the Nanobebe instructions for specific timing based on your microwave’s wattage (e.g., 4 minutes for 1000W).
- Cool Down: Once the microwave cycle is complete, allow the sterilizer to cool for at least 5 minutes before handling. The unit will be very hot and filled with steam.
- Remove Items: Carefully remove the sterilizer using the heat-resistant handles. Open the lid away from your face to allow steam to escape. Use clean tongs to remove sterilized items.
General Maintenance Tips:
- Regular Cleaning: Wash the sterilizer base and lid periodically with warm, soapy water to remove any residue.
- Descaling: If you live in an area with hard water, mineral deposits may build up over time. Descale your steam sterilizer regularly (check manufacturer’s instructions, often with a vinegar solution or descaling agent) to maintain efficiency.
- Air Dry: For microwave sterilizers without a drying function, allow items to air dry completely on a clean rack before storage to prevent moisture buildup.
- Inspect Parts: Regularly inspect all parts of your sterilizer for wear and tear, and replace any damaged components.
Important Notes for Safe Sterilization
Your baby’s safety is paramount. Always adhere to these important guidelines when using any bottle sterilizer:
- Read Instructions: Always read the manufacturer’s instruction manual thoroughly before initial use and keep it for future reference.
- Pre-Wash Items: Sterilization is not a substitute for washing. Always clean all feeding items thoroughly to remove milk residue before sterilizing.
- Beware of Hot Steam: Steam sterilizers, especially microwave models, get extremely hot. Always use oven mitts or heat-resistant handles, and open lids away from your body to avoid steam burns.
- Cooling Time: Allow adequate cooling time for the sterilizer and its contents before handling.
- Use Only Water: For steam sterilizers, use only water. Do not add chemical sterilizing solutions or harsh detergents to the unit.
- Microwave Compatibility: For microwave sterilizers, ensure your microwave’s turntable is clean and dry. Do not use metallic items in the sterilizer, as this can damage your microwave. If you have a combination oven, ensure the grill function is off and the oven has cooled down before use.
- Storage: Store sterilized items properly. If the sterilizer’s lid is kept closed, items often remain sterile for up to 24 hours.
Conclusion
Choosing the right bottle sterilizer is a small but significant step in safeguarding your baby’s health. With various types available, from electric steam to UV and versatile multifunctional units, there’s a solution to fit every family’s needs. The Nanobebe Microwave Steam Sterilizer stands out for its impressive speed, ease of use, and compact design, offering a fast and effective way to ensure your baby’s feeding essentials are hygienically clean. Its ability to sterilize a variety of items in just minutes, coupled with its portability, makes it a highly practical choice for modern parents. By understanding the importance of sterilization and following proper usage and maintenance guidelines, you can provide a safer feeding environment for your little one, granting you valuable peace of mind. What steps will you take today to ensure your baby’s feeding routine is as safe and simple as possible?
Frequently Asked Questions
How long does the Nanobebe Microwave Steam Sterilizer take to sterilize?
The Nanobebe Microwave Steam Sterilizer can sterilize items in as little as 4 minutes for 1000-watt microwaves, or up to 10 minutes for lower wattage models. The exact time depends on your microwave’s power, so it’s essential to check the instruction manual for specific guidance.
Can I sterilize all bottle brands in the Nanobebe Microwave Steam Sterilizer?
Yes, the Nanobebe Microwave Steam Sterilizer is designed to be versatile and can accommodate most standard baby bottles, including those from other brands, along with breast pump parts, pacifiers, and other small baby accessories. Its adjustable pegs allow for flexible arrangement.
Does the Nanobebe Microwave Steam Sterilizer have a drying function?
No, the Nanobebe Microwave Steam Sterilizer does not include a built-in drying function. After the sterilization cycle, items will be wet from the steam. You can either leave them inside the closed unit to air dry, or carefully remove them with clean tongs and place them on a separate drying rack.
How much water do I need to add to the Nanobebe Microwave Steam Sterilizer?
For effective steam sterilization, you typically need to add about 6.5 ounces (approximately 200ml) of clean water to the base of the Nanobebe Microwave Steam Sterilizer. Always refer to the product’s instruction manual for the precise amount to ensure optimal performance.
How often should I sterilize baby bottles and accessories?
It is recommended to sterilize baby bottles and feeding accessories after every use, especially for newborns and infants under two months of age, or if your baby has a compromised immune system. As your baby gets older, daily sterilization may be sufficient, but always consult with your pediatrician for personalized advice.