Ensuring your baby’s feeding equipment is immaculately clean is a top priority for every parent. A bottle sterilizer is an invaluable tool in this effort, providing peace of mind that harmful bacteria are eliminated. However, these damp environments can, paradoxically, become breeding grounds for an unwelcome guest: mold. Discovering mold in your sterilizer can be alarming, but with effective DIY methods, you can safely and thoroughly remove it, restoring your sterilizer’s efficiency and protecting your little one’s health.
Why Your Bottle Sterilizer Needs Regular Mold Cleaning
A bottle sterilizer, designed to kill germs, can ironically harbor mold and bacteria if not properly maintained. The constant presence of moisture and occasional residue from milk or formula creates an ideal habitat for mold spores to thrive. Regular cleaning is crucial for several reasons:
- Prevent Bacterial and Mold Growth: The warm, moist environment inside a sterilizer is perfect for mold and mildew. Regular cleaning removes these microorganisms before they can spread.
- Maintain Sterilization Efficiency: Over time, mineral deposits from hard water (limescale) can accumulate on the heating plate and internal components. This buildup can reduce the sterilizer’s effectiveness and even promote mold growth, making it less efficient at germ elimination.
- Eliminate Unpleasant Odors: Mold and bacterial growth often produce musty or sour odors that can transfer to your baby’s bottles and feeding accessories, making feeding less appealing.
- Extend the Sterilizer’s Lifespan: Buildup of mold and limescale can damage the internal workings of your sterilizer, leading to malfunctions or a shorter operational life. Consistent cleaning helps preserve your appliance.
- Protect Your Baby’s Health: Exposure to mold, especially for infants with developing immune systems, can lead to respiratory issues, allergies, or other health concerns. A clean sterilizer ensures a safer feeding environment.
|
Our Picks for the Best Bottle sterilizer in 2026
As an Amazon Associate I earn from qualifying purchases.
|
||
| Num | Product | Action |
|---|---|---|
| 1 | Momcozy 3 Layers Large Bottle Sterilizer and Dryer, Fast Sterilize and Dry, Universal Bottle Sterilizer for All Bottles & Breast Pump Accessories, Touch Screen & Auto-Off Bottle Sanitizer |

|
| 2 | GROWNSY Bottle Sterilizer and Dryer, Compact Electric Steam Baby Bottle Sterilizer (Esterilizador de Biberones), Bottle Sanitizer for Baby Bottles, Pacifiers, Pump Parts |
|
| 3 | Bottle Sterilizer and Dryer, 99.999% Deep Sterilization, 6-min Rapid Disinfection, Up to 12 Bottles, HEPA Filter, All-in-One for Baby Bottles, Breast Pump Parts & Newborn Essentials |
|
| 4 | Dr. Brown's All-in-One Sterilizer and Dryer for Baby Bottles, Parts and Other Newborn Essentials |
|
| 5 | HEYVALUE Ease-Steam Bottle Sterilizer, Compact Baby Bottle Sterilizer, Fast One-Touch Operation (Esterilizador de Biberones), Electric Sterilizer for Baby Bottles, Baby Essentials & Breast Pump Parts |
|
| 6 | Momcozy KleanPal Pro Baby Bottle Washer, Sterilizer & Dryer - All-in-One Cleaning Machine for Bottles, Pump Parts & Baby Essentials - Time-Saving & Effortless Care |
|
| 7 | Papablic Baby Bottle Sterilizer and Dryer Pro, Esterilizador De Biberones, Electric Steam Sterilizer for Baby Bottles, Pacifiers, and Pump Parts, Large Capacity 10 Bottles |
|
| 8 | Bear Bottle Sterilizer and Dryer, 2 Layers Large Electric Steam Baby Bottle Sterilizer, Fast Bottle Sanitizer and Dryer for All Bottles & Accessories, Time-Saving Design |
|
| 9 | Bottle Sterilizer, Baby Bottle Steam Sterilizer, Electric Baby Bottle Sanitizer with Timer for Baby Bottles, Pacifiers, Pump Parts |
|
| 10 | Momcozy Bottle Sterilizer and Dryer, Modular Nesting Space Saving Design, 6 Bottles Capacity, 4 in 1 Compact Sterilizer for Baby Bottles, Breast Pump Parts & Newborn Essentials, Drying Rack Included |
|
Understanding Mold in Sterilizers
Mold often appears as black, green, or white spots and can have a musty odor. In a bottle sterilizer, you’ll typically find it in damp, hidden areas. These include crevices, corners, the heating element plate, and the water reservoir where moisture tends to linger. The primary culprits are persistent moisture and any leftover organic residue, combined with infrequent cleaning. Identifying these areas is the first step toward effective removal.
DIY Methods for Removing Mold from Your Bottle Sterilizer
Before you begin any cleaning, always ensure your sterilizer is unplugged and completely cool. Disassemble all detachable parts like trays, lids, and bottle holders to access every nook and cranny.
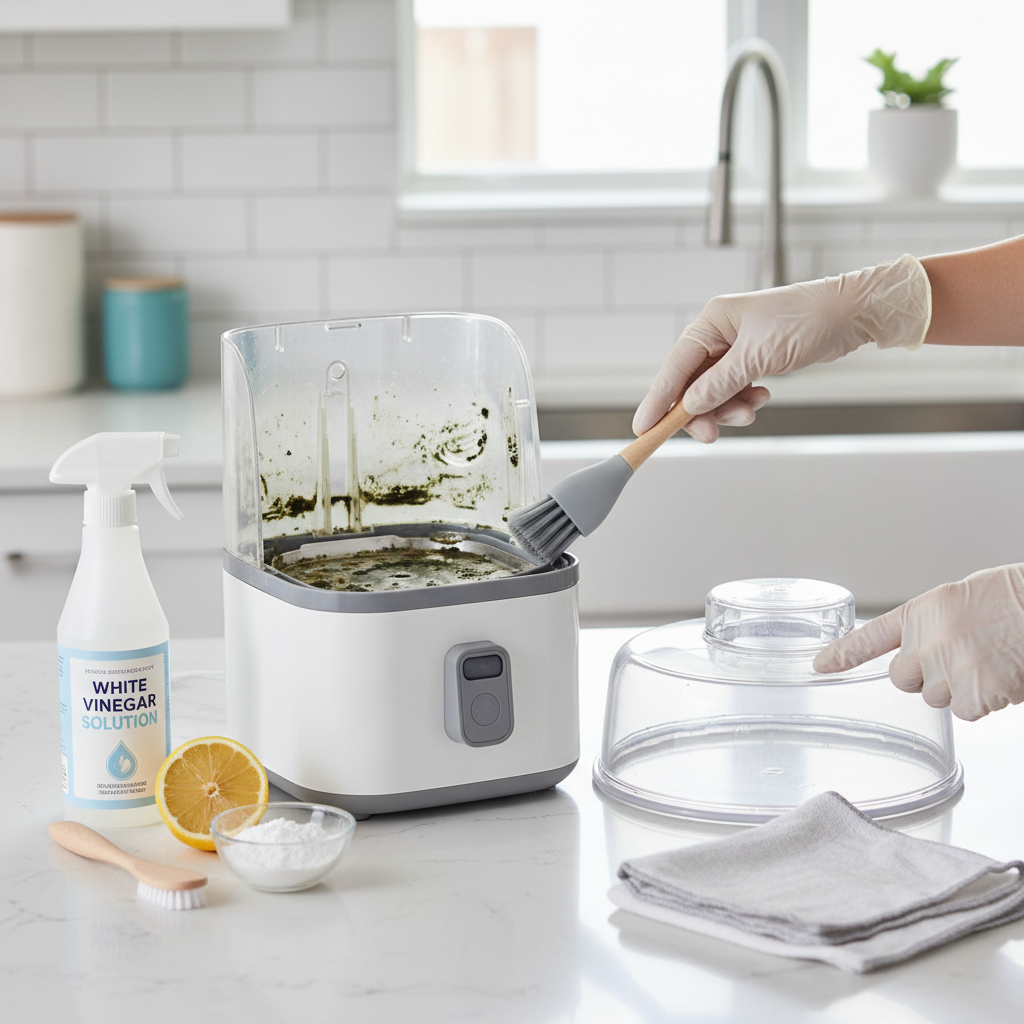
Method 1: White Vinegar Power
White vinegar is a natural disinfectant and descaler, highly effective at killing mold spores and dissolving mineral buildup.
- What you’ll need: White vinegar, warm water, a soft brush (like a bottle brush or an old toothbrush for tight spots), and a soft cloth or sponge.
- Step-by-step instructions:
- Prepare Initial Rinse (Optional): Rinse all disassembled parts under warm water to remove any loose residue.
- Create Vinegar Solution: For soaking detachable parts, mix equal parts white vinegar and warm water in a basin. For the main sterilizer unit’s reservoir, a ratio of 1 part vinegar to 2 parts water is often sufficient, but adjust based on the severity of mold.
- Soak/Fill and Let Sit: Submerge detachable parts in the vinegar solution for at least 30 minutes to an hour. For the main reservoir, pour the vinegar solution into the tank and let it sit for the same duration. For tougher mold, an overnight soak can be beneficial.
- Scrub Away Mold: After soaking, gently scrub all affected areas, especially corners and crevices, with your soft brush or cloth. Vinegar’s natural acidity helps to loosen mold and limescale.
- Rinse Thoroughly: Rinse all components meticulously under running water until no vinegar smell or mold residue remains.
- Run an Empty Sterilization Cycle: For steam sterilizers, reassemble the unit, fill the reservoir with clean, fresh water, and run a full sterilization cycle without any bottles. This helps to flush out any lingering vinegar or mold spores from internal pathways.
- Dry Completely: Crucially, dry all parts thoroughly with a clean cloth, then leave them disassembled or with the lid open in a well-ventilated area until completely air-dried before reassembling.
Method 2: Baking Soda Boost
Baking soda is a gentle abrasive, an odor neutralizer, and an effective cleaner for milder mold issues.
- What you’ll need: Baking soda, warm water, a soft brush/sponge/cloth.
- Step-by-step instructions:
- Prepare Initial Rinse: As with vinegar, rinse disassembled parts under warm water.
- Create Baking Soda Solution/Paste: Dissolve 2 tablespoons of baking soda in 1 cup of warm water to create a solution for general cleaning. For stubborn mold spots, create a thick paste with baking soda and a small amount of water.
- Apply and Let Sit: Apply the solution or paste directly to the moldy areas. Let it sit for 30-60 minutes to allow the baking soda to work its magic.
- Scrub Gently: Use your soft brush or cloth to gently scrub away the mold. The mild abrasive nature of baking soda helps lift the mold without scratching surfaces.
- Rinse Thoroughly: Rinse all parts completely under running water to remove all baking soda residue and loosened mold.
- Dry Completely: Ensure all components are thoroughly dried, ideally by air-drying in a well-ventilated space, before putting the sterilizer back together.
Method 3: Citric Acid for Tough Limescale (and Associated Mold)
Citric acid is an excellent descaler and can help tackle mold often associated with mineral buildup.
- What you’ll need: Citric acid powder, warm water.
- Step-by-step instructions:
- Unplug and Prepare: Ensure the sterilizer is unplugged and empty.
- Prepare Citric Acid Solution: Dissolve 1 tablespoon of citric acid powder in 1 cup of warm water.
- Pour and Run Cycle: Pour the solution into the sterilizer’s water reservoir. Run a full sterilization cycle with the solution.
- Let Sit: After the cycle finishes, let the solution sit in the sterilizer for an additional 20 minutes.
- Flush and Run Empty Cycle: Drain the solution, then fill the reservoir with clean water and run another full sterilization cycle (empty) to thoroughly rinse the system.
- Dry Completely: After the final cycle, ensure the sterilizer and all removable parts are completely dry before storage.
Comparison Table of Cleaning Methods
| Method | Primary Use | Effectiveness on Mold | Descaling | Safety for Baby Items | Time Needed |
|---|---|---|---|---|---|
| White Vinegar | Mold, Limescale | High | High | High | Moderate |
| Baking Soda | Mild Mold, Odors, Light Scrubber | Moderate | Low | High | Moderate |
| Citric Acid | Limescale, Mold (indirectly) | Moderate | High | High | Moderate |
Essential Tools for Mold Removal
Having the right tools makes the cleaning process easier and more effective:
- Soft Brush: A dedicated bottle brush or a clean, soft-bristled toothbrush is ideal for reaching into tight spaces, vents, and around heating elements.
- Soft Cloth or Sponge: For wiping down larger surfaces and for gentle scrubbing.
- Measuring Cups and Spoons: To accurately mix cleaning solutions.
- Basin or Bowl: For soaking disassembled parts.
Preventing Mold Growth in Your Bottle Sterilizer
The best way to deal with mold is to prevent it from growing in the first place. Incorporate these habits into your routine:
Daily Habits:
- Clean After Every Use: After each sterilization cycle, rinse the sterilizer’s water reservoir and wipe down the interior with a clean cloth.
- Always Dry Thoroughly: This is the most critical step. Disassemble all removable parts immediately after use, dry them with a clean, dry cloth, and then allow them to air dry completely in a well-ventilated area. Leaving the sterilizer lid open aids air circulation.
- Store in a Dry, Ventilated Area: Avoid storing your sterilizer in damp, enclosed spaces. A dry countertop with good airflow is ideal.
Weekly/Monthly Maintenance:
- Regular Descaling: Even without visible mold, mineral buildup (limescale) from hard water creates optimal conditions for mold. Perform a descaling clean using white vinegar or citric acid at least once a month, or more frequently if you have very hard water.
- Use Distilled Water: Whenever possible, use distilled water in your sterilizer. This significantly minimizes mineral buildup, reducing the risk of limescale and subsequent mold growth.
- Inspect Regularly: Make it a habit to inspect all parts of your sterilizer regularly for early signs of mold or mineral deposits. Early detection makes cleaning much easier.
Important Safety Precautions
When cleaning your bottle sterilizer, prioritize safety:
- Always Unplug and Cool Down: Never attempt to clean a hot or plugged-in sterilizer. This prevents electric shock and burns.
- Avoid Harsh Chemicals: Do not use bleach, abrasive cleaners, or scouring pads on your sterilizer unless explicitly instructed by the manufacturer. Harsh chemicals can damage the appliance and leave harmful residues that could transfer to your baby’s bottles.
- Rinse Thoroughly: Ensure every trace of your cleaning solution is rinsed away. Residue from vinegar or baking soda can affect the taste of milk or formula, and could potentially irritate your baby.
- Follow Manufacturer’s Instructions: Always refer to your specific sterilizer’s manual for any particular cleaning instructions or warnings.
“A clean sterilizer isn’t just about sparkling surfaces; it’s about providing a truly hygienic foundation for your baby’s nutrition and well-being.”
Conclusion
A clean baby bottle sterilizer is fundamental to safeguarding your infant’s health. While mold can be a concerning discovery, it is a manageable problem with simple, effective DIY cleaning methods. By regularly employing solutions like white vinegar, baking soda, or citric acid, coupled with diligent drying and preventative measures, you can ensure your sterilizer remains a pristine and reliable tool. Remember, consistency in cleaning and thorough drying are your best defenses against mold, guaranteeing a safe and hygienic feeding environment for your little one.
What are your go-to tips for keeping your bottle sterilizer sparkling clean?
Frequently Asked Questions
Is mold in a bottle sterilizer dangerous?
Yes, mold in a bottle sterilizer can pose health risks to infants, whose immune systems are still developing. Exposure to mold can lead to respiratory issues, allergies, and other sensitivities. It’s crucial to remove mold promptly and thoroughly to ensure a safe feeding environment.
How often should I clean my bottle sterilizer?
For optimal hygiene and to prevent mold and limescale buildup, it’s recommended to rinse and wipe down your sterilizer after every use and perform a deep clean with descaling agents like vinegar or citric acid at least once a month. If you use hard water, more frequent descaling may be necessary.
Can I use bleach to clean my baby bottle sterilizer?
Generally, it’s best to avoid using bleach directly on your baby bottle sterilizer unless explicitly recommended by the manufacturer. While diluted bleach solutions are sometimes used to sanitize baby feeding items, it can be difficult to ensure complete rinsing from the sterilizer unit itself, potentially leaving harmful residues. Stick to natural, safe alternatives like white vinegar, baking soda, or citric acid for the appliance.
What is limescale, and how does it relate to mold?
Limescale is a hard, chalky deposit primarily composed of calcium carbonate, which accumulates from mineral-rich (hard) water. It often appears as white or cloudy residue on the heating plate and other internal surfaces of your sterilizer. Limescale doesn’t directly cause mold, but its porous surface can trap moisture and organic residues, creating an ideal environment for mold spores to attach and grow, making it harder to keep the sterilizer truly clean.
Can I put sterilizer parts in the dishwasher?
Some detachable parts of your bottle sterilizer, such as trays and lids, may be dishwasher safe. Always check your sterilizer’s manufacturer manual for specific instructions regarding dishwasher compatibility. If parts are not listed as dishwasher safe, it’s best to hand wash them with warm, soapy water.