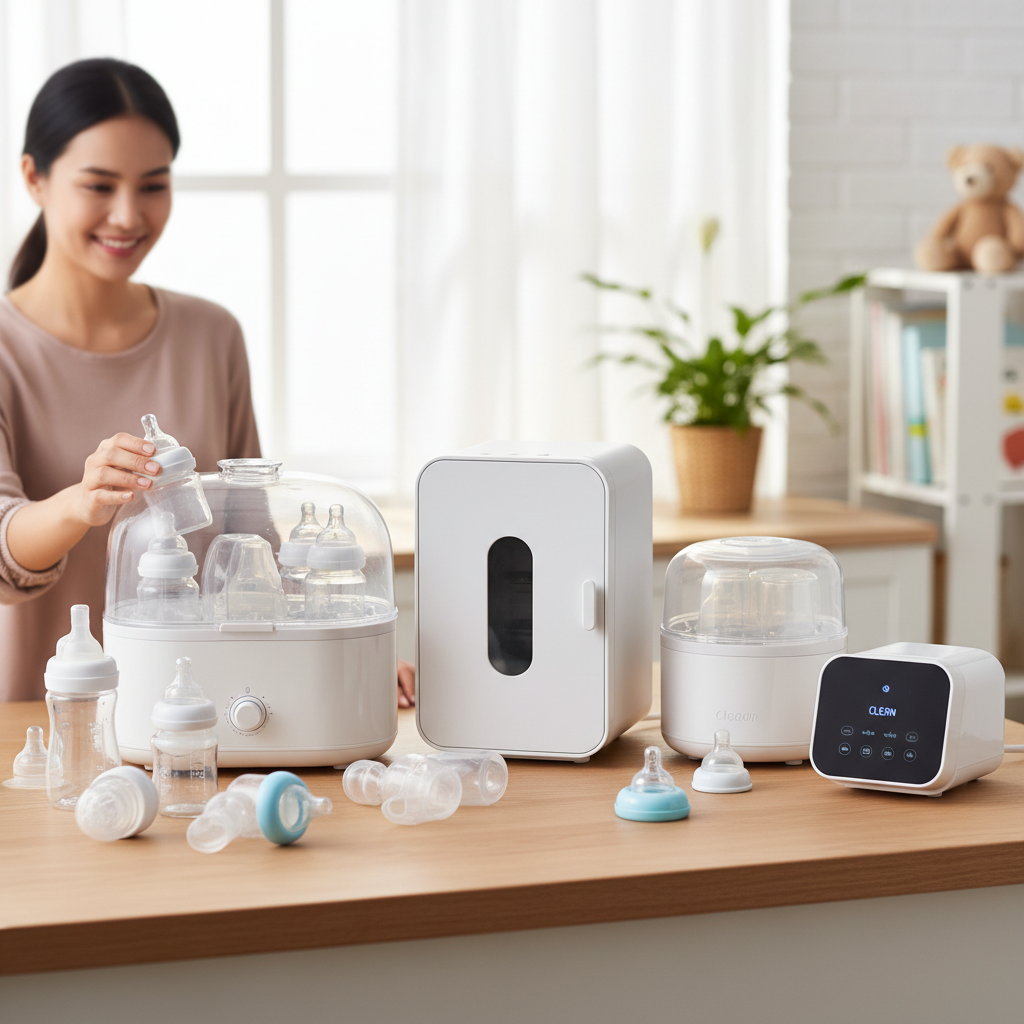
As an experienced technician in baby bottle sterilizers, I understand the critical role these devices play in safeguarding your little one’s health. With countless options available, from basic models to high-tech solutions featuring smart sensors, choosing the right sterilizer can feel overwhelming. This comprehensive guide is designed to cut through the noise, offering clear, actionable advice to help you select the best bottle sterilizer for your family’s needs. We’ll explore the various technologies, essential features, and what to look for to ensure your baby’s feeding equipment is impeccably clean and safe.
Why Bottle Sterilization is Essential
The delicate immune systems of newborns and infants are highly susceptible to harmful bacteria and germs that can thrive in milk residue. While washing bottles removes visible dirt, it doesn’t eliminate all microscopic pathogens. This is where a bottle sterilizer becomes an indispensable tool. Sterilizing effectively kills 99.9% of harmful bacteria, viruses, and molds, preventing potential illnesses such as gastroenteritis and thrush, and offering crucial protection during these vulnerable early months.
Traditionally, parents would boil bottles in hot water, a time-consuming and sometimes hazardous method. Modern bottle sterilizers offer a more efficient, safer, and convenient alternative, integrating seamlessly into busy parenting routines. They provide a reliable way to ensure bottles, nipples, pump parts, and pacifiers are hygienically clean and ready for use.
Types of Bottle Sterilizers: Finding Your Perfect Match
The market offers a range of sterilizer types, each with unique benefits and considerations. Understanding these differences is key to making an informed choice.
Steam Sterilizers
Steam sterilization is a widely popular and effective method, utilizing high-temperature steam to eliminate germs.
-
Electric Steam Sterilizers: These countertop appliances are robust and efficient. They heat water to produce intense steam that sanitizes multiple bottles and accessories in minutes.
- Principle of Operation: Water in a heating element is turned into steam, enveloping and sterilizing the items inside.
- Advantages: Typically spacious, accommodating many items; quick cycles (often 6-10 minutes); highly effective at killing germs; some models include drying functions.
- Disadvantages: Requires counter space; necessitates regular descaling to prevent mineral buildup; may leave water spots if not dried.
-
Microwave Steam Sterilizers: Designed for use inside a microwave, these are a compact and portable option.
- How to Use: Add a small amount of water to the base, load bottles, and microwave for a few minutes.
- Advantages: Extremely fast (2-8 minutes depending on microwave wattage); highly portable and great for travel or small kitchens; generally more affordable.
- Disadvantages: Capacity is often limited; requires a microwave of adequate size; items may remain wet as there’s usually no drying function.
|
Our Picks for the Best Bottle sterilizer in 2026
As an Amazon Associate I earn from qualifying purchases.
|
||
| Num | Product | Action |
|---|---|---|
| 1 | Dr. Brown's All-in-One Sterilizer and Dryer for Baby Bottles, Parts and Other Newborn Essentials |

|
| 2 | Momcozy 3 Layers Large Bottle Sterilizer and Dryer, Fast Sterilize and Dry, Universal Bottle Sterilizer for All Bottles & Breast Pump Accessories, Touch Screen & Auto-Off Bottle Sanitizer |
|
| 3 | Momcozy KleanPal Pro Baby Bottle Washer, Sterilizer & Dryer - All-in-One Cleaning Machine for Bottles, Pump Parts & Baby Essentials - Time-Saving & Effortless Care |
|
| 4 | HEYVALUE Ease-Steam Bottle Sterilizer, Compact Baby Bottle Sterilizer, Fast One-Touch Operation (Esterilizador de Biberones), Electric Sterilizer for Baby Bottles, Baby Essentials & Breast Pump Parts |
|
| 5 | Papablic Baby Bottle Sterilizer and Dryer Pro, Esterilizador De Biberones, Electric Steam Sterilizer for Baby Bottles, Pacifiers, and Pump Parts, Large Capacity 10 Bottles |
|
| 6 | Momcozy Bottle Sterilizer and Dryer, Modular Nesting Space Saving Design, 6 Bottles Capacity, 4 in 1 Compact Sterilizer for Baby Bottles, Breast Pump Parts & Newborn Essentials, Drying Rack Included |
|
| 7 | Bear Bottle Sterilizer and Dryer, 2 Layers Large Electric Steam Baby Bottle Sterilizer, Fast Bottle Sanitizer and Dryer for All Bottles & Accessories, Time-Saving Design |
|
| 8 | Bottle Sterilizer and Dryer, 99.999% Deep Sterilization, 6-min Rapid Disinfection, Up to 12 Bottles, HEPA Filter, All-in-One for Baby Bottles, Breast Pump Parts & Newborn Essentials |
|
| 9 | Bottle Sterilizer, Baby Bottle Steam Sterilizer, Electric Baby Bottle Sanitizer with Timer for Baby Bottles, Pacifiers, Pump Parts |
|
| 10 | GROWNSY Bottle Sterilizer and Dryer, Compact Electric Steam Baby Bottle Sterilizer (Esterilizador de Biberones), Bottle Sanitizer for Baby Bottles, Pacifiers, Pump Parts |
|
UV Sterilizers
Utilizing ultraviolet light, UV sterilizers offer a chemical-free sterilization method without water or heat.
- Technology: UV-C light disrupts the DNA of bacteria and viruses, rendering them inactive.
- Advantages: No water or steam means no descaling or drying needed; quiet operation; can often sterilize items that aren’t suitable for steam (e.g., electronics, toys); some models double as sterile storage.
- Disadvantages: Generally higher upfront cost; UV bulbs need periodic replacement; effectiveness can depend on direct light exposure, so proper arrangement is crucial; some opaque items may not be fully sterilized.
All-in-One Sterilizers (Wash, Sterilize, Dry)
For the ultimate convenience, multi-functional sterilizers combine several processes into one seamless operation.
- Functionality: These advanced units can wash, sterilize, and then dry baby bottles and accessories.
- Advantages: Unparalleled convenience and time-saving; hands-off operation from start to finish; ensures items are not only sterile but also dry and ready for immediate use or storage; often includes smart features for optimized cycles.
- Disadvantages: Highest price point; typically larger footprint requiring dedicated counter space; might require specific detergents for washing functions.
Comparison Table: Choosing Your Sterilizer
Here’s a quick overview to help you compare the most common types of bottle sterilizers:
| Feature | Electric Steam | Microwave Steam | UV Sterilizer | All-in-One |
|---|---|---|---|---|
| Price Range | Low to Mid | Very Low to Low | Mid to High | High |
| Sterilization Time | Moderate (6-10 mins) | Fast (2-8 mins) | Fast (7-15 mins) | Moderate (10-30 mins) |
| Drying Function | Often Included | Rarely Included | Inherently Dry | Always Included |
| Ease of Use | High | High | High | Very High |
| Maintenance | Regular descaling | Occasional cleaning | Bulb replacement | Regular cleaning |
| Portability | Low | High | Low | Very Low |
| Capacity | High | Low to Moderate | Moderate to High | High |
| Water Usage | Required | Required | None | Required (for wash) |
Key Factors When Choosing a Bottle Sterilizer (Buying Guide)
Selecting the ideal bottle sterilizer requires considering several practical aspects tailored to your lifestyle and needs.
- Capacity and Size: How many bottles do you need to sterilize daily? Consider your typical feeding schedule. If you have twins or use a breast pump frequently, a higher-capacity unit will be invaluable. Also, measure your kitchen counter space to ensure the sterilizer fits comfortably without cluttering your workspace.
- Material and Safety: Prioritize sterilizers made from BPA-free, food-grade materials. This ensures no harmful chemicals leach into your baby’s feeding equipment during the sterilization process. Quality materials also contribute to the device’s durability and longevity.
- Features and Functionality:
- Drying Function: A sterilizer with an integrated drying cycle is a game-changer, eliminating the need for air-drying and preventing water spots or re-contamination.
- Auto Shut-off: A vital safety feature that turns the unit off once the cycle is complete or if water runs out.
- Smart Sensors and Timers: Advanced models often include “smart sensor” technology. These sensors can detect water levels, adjust sterilization or drying times based on ambient temperature or load, and offer one-touch auto modes, greatly simplifying operation and ensuring optimal results every time. They contribute to efficiency and reduce parental guesswork.
- Storage Function: Some sterilizers offer a sterile storage mode, keeping items sanitized for up to 24 or even 72 hours, ready for the next feeding.
- Compatibility: Ensure the sterilizer can accommodate all your baby’s items, including various bottle brands and sizes, pacifiers, and breast pump components.
- Brand Reputation and Warranty: Opt for reputable brands known for quality and safety. A good warranty provides peace of mind and protection for your investment. While specific reviews for lesser-known brands like “Kioro” may be scarce, focusing on the type of technology and features they promise (like a smart sensor) is crucial.
- Price: Sterilizers range widely in price. Determine your budget and balance it against the features you value most. Sometimes, investing in a slightly more expensive model with combined functions can save money and hassle in the long run.
Top Bottle Sterilizer Features to Look For Today
While a specific “Kioro Bottle Sterilizer (Smart Sensor?)” might not be widely reviewed, the concept highlights a demand for intelligent, user-friendly solutions. Here are the kinds of top features you should seek in any modern sterilizer, reflecting the benefits a “smart sensor” system would likely offer:
- Integrated Sterilize and Dry Cycles: Look for models that seamlessly transition from sterilization to a powerful drying cycle, often using HEPA-filtered air to prevent re-contamination and ensure items are completely dry.
- Intuitive Touch Controls & Digital Displays: Easy-to-read interfaces with simple one-touch operations make daily use effortless, especially during sleep-deprived moments.
- Adjustable Cycle Modes: Options like “sterilize only,” “dry only,” and “auto mode” give you flexibility. An advanced “smart sensor” would likely optimize these modes based on load size or remaining moisture.
- Long-Term Sterile Storage: Products offering a prolonged sterile storage environment (e.g., 24 to 72 hours) are incredibly convenient, eliminating the need for immediate removal and freeing up your time.
- BPA-Free, Food-Grade Construction: Non-negotiable for any baby product that comes into contact with food.
- Compact Yet Spacious Design: Modern sterilizers are often designed to maximize internal capacity while minimizing countertop footprint, a crucial factor for many families.
How to Use and Maintain Your Bottle Sterilizer
Proper usage and maintenance are key to ensuring your sterilizer operates effectively and safely for years to come.
- Before Sterilization: Always disassemble bottles and accessories and wash them thoroughly with warm, soapy water to remove milk residue. Residue can hinder effective sterilization and lead to mineral buildup.
- Loading: Place items upside down to allow steam or UV light to penetrate effectively. Don’t overcrowd the sterilizer; ensure there’s enough space for circulation.
- Water (for Steam Sterilizers): Use distilled water whenever possible to minimize mineral buildup (limescale) which can reduce efficiency and leave spots. Always fill to the marked line.
- Running the Cycle: Select your desired mode (sterilize, dry, or auto). If your unit has a “smart sensor,” it might automatically detect the optimal settings.
- Cooling and Removal: For steam sterilizers, allow items to cool before removing them to avoid burns. Use tongs to handle sterilized items and prevent re-contamination.
- Cleaning:
- Steam Sterilizers: Descale regularly (every 2-4 weeks, depending on water hardness). Use a descaling solution (citric acid or white vinegar and water) following manufacturer instructions. Wipe down the heating plate and interior.
- UV Sterilizers: Wipe the interior and UV bulbs with a clean, damp cloth. Replace UV bulbs as recommended by the manufacturer.
- All Sterilizers: Clean the exterior with a damp cloth. Never immerse the electrical base in water.
Important Usage Tips
- Read the Manual: Always consult your sterilizer’s user manual for specific instructions, safety warnings, and maintenance guidelines unique to your model.
- Clean First: Sterilization is not a cleaning process. Items must be washed thoroughly before being placed in the sterilizer.
- Avoid Opening During Cycle: For steam sterilizers, opening the lid during a cycle can cause steam burns. For UV sterilizers, it can expose you to UV light. Wait until the cycle is complete.
- Air Circulation: Ensure the sterilizer has adequate ventilation around it, especially during drying cycles, to dissipate heat and moisture.
- Regular Inspections: Periodically check for any signs of wear and tear, especially on electrical cords or heating elements.
Conclusion
Choosing the right bottle sterilizer is a pivotal step in ensuring your baby’s health and simplifying your daily routine. While a “Kioro Bottle Sterilizer (Smart Sensor?)” might represent an advanced solution, the core principles of effective sterilization remain constant across all brands. Whether you opt for a rapid microwave unit, a robust electric steam model, a chemical-free UV sterilizer, or a comprehensive all-in-one system, prioritizing safety, efficiency, and convenience will lead you to the perfect choice. Embrace the technology that gives you peace of mind, knowing your baby’s feeding essentials are meticulously clean.
What feature do you consider most essential in a bottle sterilizer for your family?
Frequently Asked Questions
What does “Smart Sensor” mean in a bottle sterilizer?
In a bottle sterilizer, “Smart Sensor” technology typically refers to features that automate and optimize the sterilization and drying process. This can include sensors that detect water levels to prevent dry boiling, adjust drying times based on ambient temperature or remaining moisture, or offer intelligent one-touch “auto” modes that combine sterilization and drying for maximum efficiency and safety without manual adjustments.
How often should I sterilize baby bottles?
For newborns and infants under two months old, it is generally recommended to sterilize bottles and feeding equipment at least once a day, in addition to washing after every use. As your baby grows and their immune system develops, the frequency can be reduced based on your preference and pediatrician’s advice, though thorough washing remains essential.
Can I sterilize breast pump parts in a bottle sterilizer?
Yes, most bottle sterilizers are designed to accommodate a variety of baby feeding items, including breast pump parts, pacifiers, and even small toys. Always check the manufacturer’s guidelines for your specific sterilizer model to ensure compatibility and proper placement for effective sterilization.
Is a drying function necessary in a bottle sterilizer?
While not strictly “necessary” for sterilization, a drying function significantly enhances convenience and hygiene. It eliminates the need for air-drying, which can introduce new contaminants and leave water spots. A drying cycle ensures bottles are ready for immediate use or sterile storage, saving time and offering greater peace of mind.
How do I prevent limescale buildup in my steam sterilizer?
To prevent limescale (mineral buildup), regularly descale your steam sterilizer using a descaling solution recommended by the manufacturer, or a mixture of white vinegar and water. Using distilled water for sterilization can also significantly reduce the accumulation of mineral deposits, maintaining the unit’s efficiency and lifespan.